Setting up an Entity Framework Core Web API on Azure with SQLServer: A Step-by-Step Guide for hobby projects
I spend my nights buried in neon lights and code, delivering cutting-edge genetics data to data scientist. I love exploring the latest advancements in technology and genetics with my cat by my side.
The lines between human and machine have blurred, and technology has augmented many aspects of our lives. I believe in the power of technology to make the world a better place, and I'm excited to be a part of this ever-evolving field.
Setting up an Entity Framework Core web API on Azure can be a bit daunting. I really struggle with these things and I couldn't find much help for my use case. Still, it's definitely doable and in this blog post, I'll walk through the process of deploying a web API that uses Entity Framework Core with SQLServer to Azure App Services.
My app, or visual studio solution, has 7 projects in it - API, Models, Infrastructure, Services, Shared, Repository and Testing. It was a hobby project but I wanted to deploy it somewhere. I thought about setting up a home server running IIS on an old PC but I thought it was better to use Azure. I've been putting off learning about Azure for quite a while and I assumed the costs would be prohibitive. The other part I found tricky was my environment variables between local, azure and as I later found out, GitHub actions.
The cost
The Azure Cost Calculator (google it) estimates I'll spend about $15 per month. That's fine for me. There are a few things to watch out for when setting up the app service and more specifically when setting up the database. Make sure you use a DTU-based plan, rather than a VCore plan. We'll go through it all in the next sections.
Creating the app-service
Head over to azure and sign up for a pay-as-you-go account. If it's your first time, you can sign up for the free tier account and get $200 for your first 30 days. I had already wasted that by signing up and forgetting about my account.
- Create a resource group.
The first thing to do is create a resource group. This is just a word Azure uses for a group of ... you guessed it... resources. I create a resource group for each project, or even one for dev, testing, prod or whatever your development layers are. It's good to keep related resources together in a group, so they can be managed / monitored / deleted together.
Use the search bar to find the option for creating a resource group, click to create a new one and give it a name.
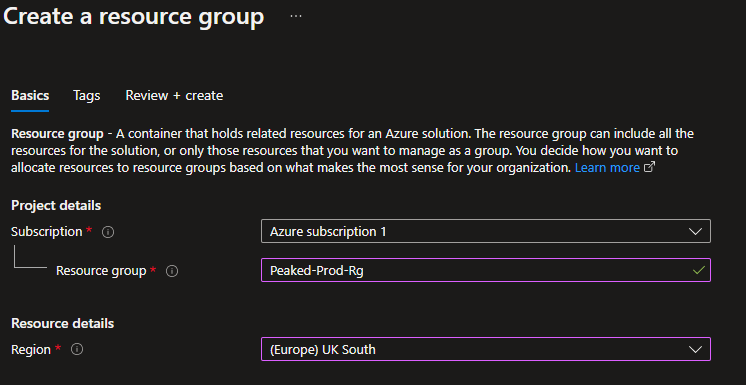
Hit the review and create button at the bottom of the page. Then press create. Voila.
Create an App-Service
You could create an app service and then separately create a database, but if you head to Azure 'Create a Resource < marketplace' and search for WebApp + Database, you can create both together.
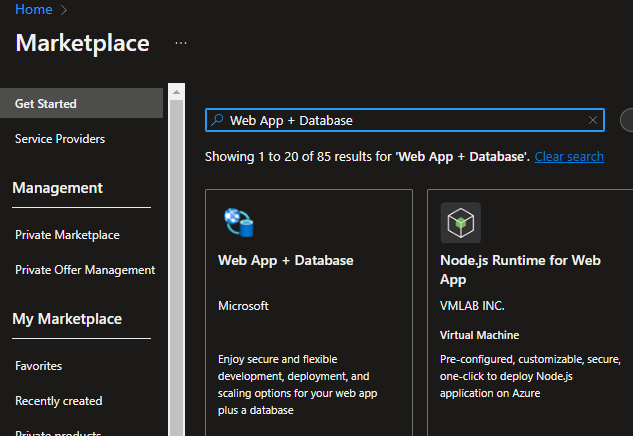
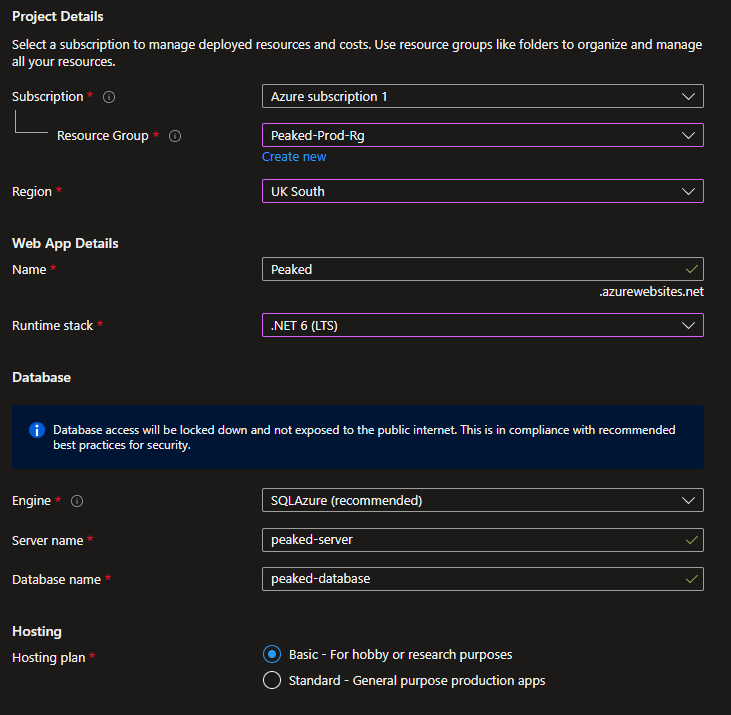
Press the button and you'll be taken to a form for creating your app service. Fill out the details making sure to select a basic plan. I'm using .net 6 and I'm based in the UK so I'll select this region. Then press review and create. The review page shows that it will be a Linux machine - that's good because it cheaper. I do my dev on my home machine which is Windows, but it shouldn't be a problem.
Press create and it'll start building all the resources and place them in the resource group you created earlier. Note that it will create more than just an app service and database. It will also create virtual network and storage and some other things.
IMPORTANT
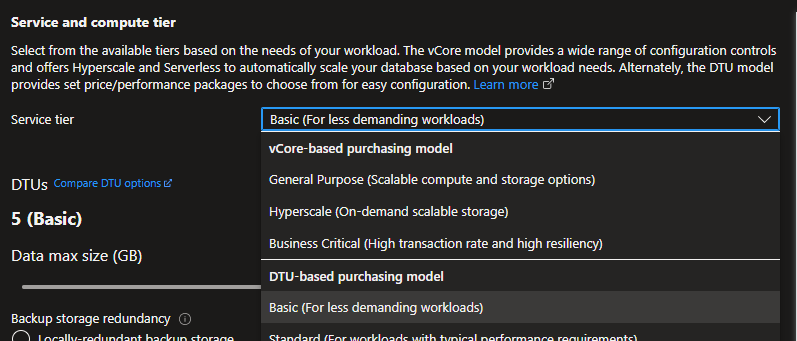
When using the AppService + Database template the SQLDatbase that is created uses a vcore based pricing tier. This is expensive so let's change it straight away.
After you created the resources, you probably got taken to some kind of loading page. Head back to your home page and click into your resource group. You'll see a list of everything that was created. Click on the database instance:

Click on the pricing tier option at the top on the right.
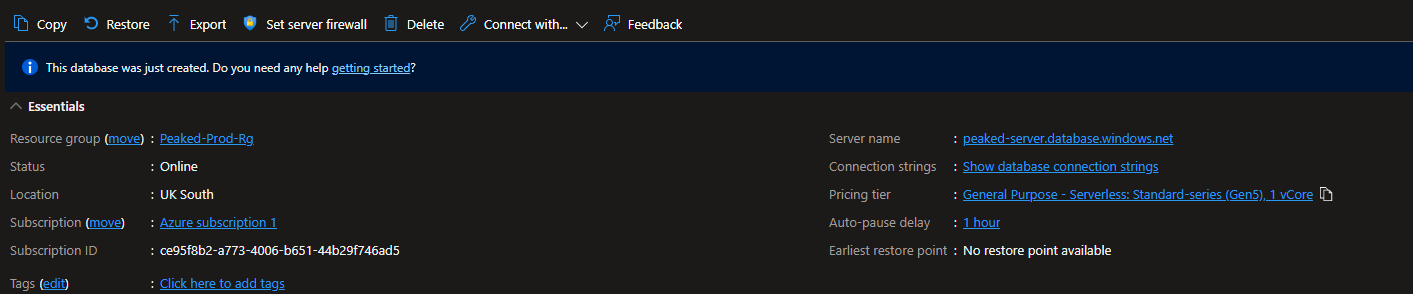
Change the service tier to DTU based - basic and press apply. This should save some money and for me, as it's just me and about 3 other people using the API, it's fine.
Great we're done creating the resources on azure. Now let's start work on deploying the app.
Using Github actions to deploy automatically
Go back to your resource group page and click on the app service itself. You'll be taken to an overview page and there will be a menu on the left for all the different things you can do.
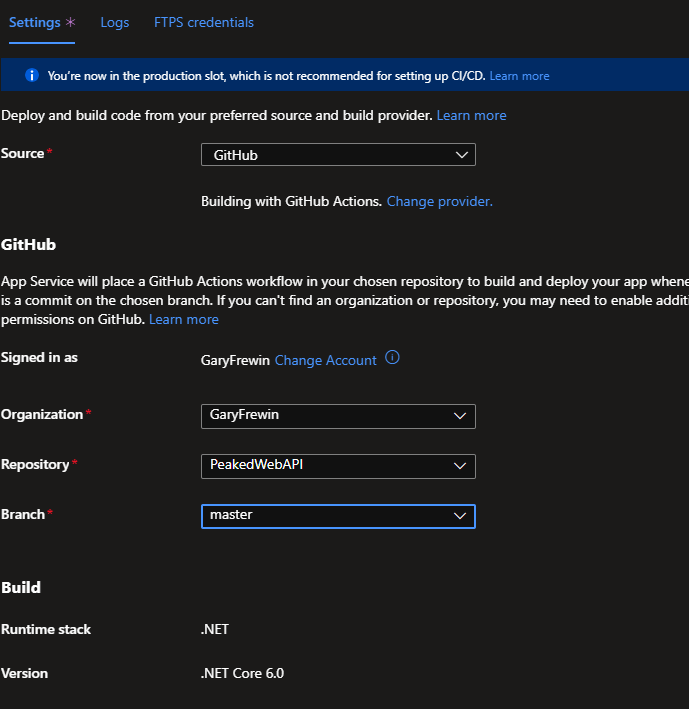
Look for Deployment Centre in this left menu. Fill out the options on this page to connect to your GitHub account, to the repository and then to the branch you want to use for deployment. You could obviously set up production and testing branches and have different deployments happening on different branches. For now, I'm just using the master branch. What this will do is every time the master branch is updated, when there is a commit, it will trigger a build and deploy workflow in github actions.
When you create this, it will create a new folder and file in your repository, so it's a good idea to make sure you've committed local changes and everything is up to date a working clean. Click the preview button at the bottom of the form and it will show you the workflow file that will get created. If you've never seen one of these, don't worry, I have no idea what most of it means but it's essentially just a bunch of steps that tell GitHub actions how to build and deploy your code.
Press save.
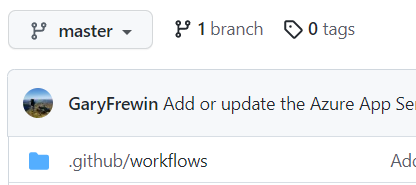
Head over to your github repo and you'll see the workflow folder that azure just created. Now is a good time to run Git Pull from your local machine just to make sure you have the latest version of the repo before you do any more coding.
Great,
If you click on actions at the top of your Github repo page, you may even see that it has already ran a build and succeeded. (If it hasn't succeeded, there could be a reason but we'll get to that later).

So this means the app is up and running, but if you go back to the App Service overview page on Azure and click on the URL for your app which is on that page, you'll probably get a message saying it is waiting for content.
Even though the app was built (code compiled into DLLs) and deployed (DLLs copied to server, the app isn't actually running, and worse yet our database is not deployed. As this is an entity framework project that means we need to run a migration.
Setting up the workflow file to handle environment variables and prepare for migration.
- First, let's add some lines of code to our workflow file. I just did this directly in GitHub. Click through to the workflow file that was created and add the following lines:

You'll obviously need to change Repository/Peaked.Repository.csproj to be the path to the project that contains your EntityFramework DBContext class. When you save this file, it'll run another build as soon as you commit this change.
At this point, my build fails because GitHub thinks the connection string is null during the build. It will depend on how your connection string is set up in your project. I use
Environment.GetEnvironmentVariable("PEAKEDDBCONN").It took me a while to figure this out, but even though this will work on local environment and Azure, providing you have set both environment variables, but it will fail on GitHub because during the build process, it checks this string and it doesn't have access to your local variable or the Azure one.Go to settings for your git hub project and on the left click on secrets and variables < actions. This is a place you can store variables. We just need something so that GitHub doesn't find a null connection string when it builds.
Click create a new Repository Secret, give it the same name as your environment variable i.e. PEAKEDDBCONN for me. Then, give it a value. I just used my local host string, but I guess you could type 'monkeynuts' in here if you wanted, it just needs to not be null.
Then you need to add a line to your workflow yaml file, the same one we edited earlier, to tell it about the environment variable. I added it like so:
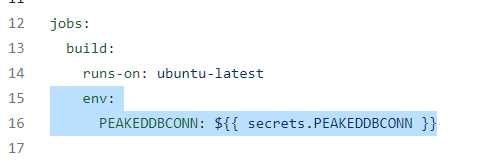
Commit the change and the build now runs successfully.
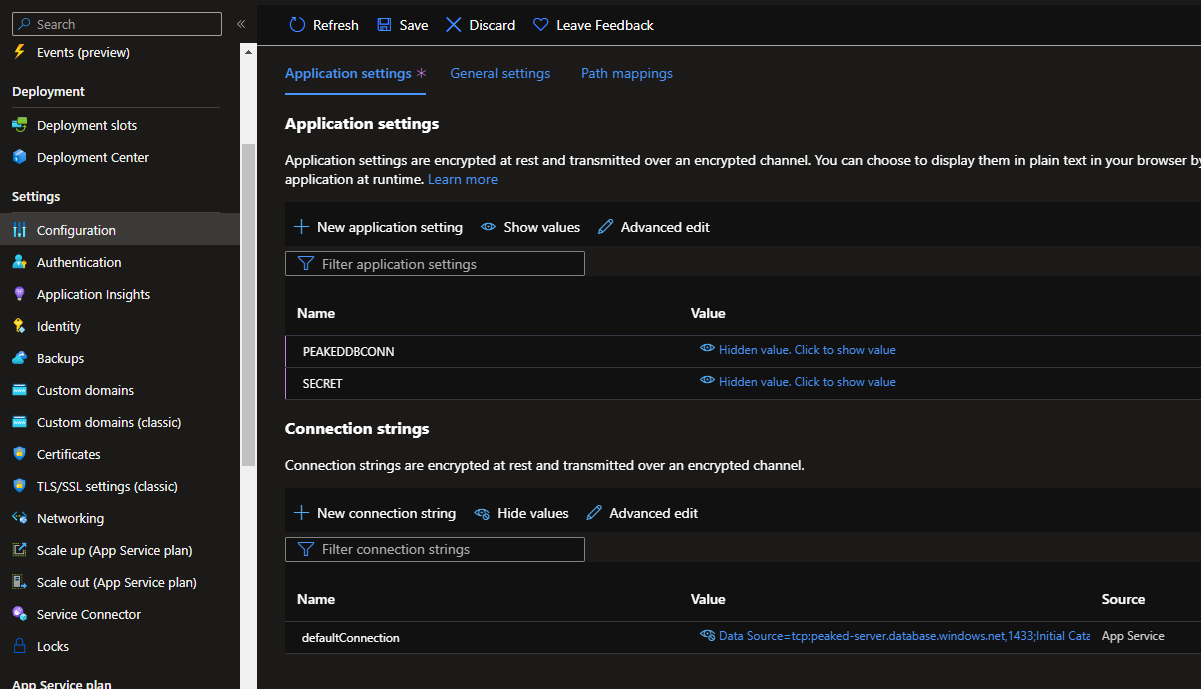
While we're doing environment variables, let's set them up on Azure. In your app service menu look for Configuration. In there you will see two sections, one containing Application Settings and one containing Connection Strings.
Application Settings will be picked up as environment variables, and that is what I am using for my connection string locally, so we'll also use it here rather than the connection string variable.
Create a new Application Setting and give it the same name as your environment variable, and then copy the connection string value into it. I also have an app secret I use for JWT encryption here. Remember to press save at the top.
Running our migration to create the database and then launch the app
Now we need to run the migration because our database is still empty. Plus even though all our compiled Dll files have been deployed to the server, the app is not actually running. On the App Service left-hand menu run the migration. Scroll down on the menu until you see SSH, and click it. Then click 'Go' on the tab that pops up. You'll be taken to a console type thing in the browser. Run the following commands:
cd /home/site/wwwroot
ls (optional, will just show all the files, you should see your compiled dll's here)
./migrate
You'll get a nice message that your migration has been applied and if you head over to your Azure database you should be able to find the query editor where you can log in to the database (get the password from the connection string in your App Service configuration). Click to expand the database tables and voila everything is there!
Finally, we want to launch the app. Go back to the app service and open the Configuration page again. Click on the general settings tab. Enter a startup command so that it knows which dll to run, it should be the one for your actuall api project. Like so:
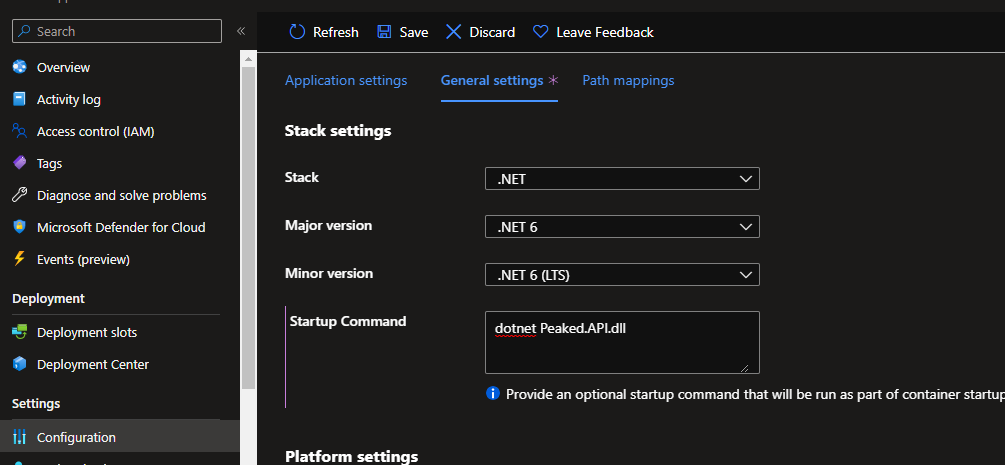
Congratulations. You can now open up postman and enter the URL for your app (found on the overview page for your app service) followed by the path of some endpoint you have defined. For me this succeeds now. Phew!


