Virtual Realitifying my real climbing wall, part 2
Photogrammetry, mesh simplification and reskinning

I spend my nights buried in neon lights and code, delivering cutting-edge genetics data to data scientist. I love exploring the latest advancements in technology and genetics with my cat by my side.
The lines between human and machine have blurred, and technology has augmented many aspects of our lives. I believe in the power of technology to make the world a better place, and I'm excited to be a part of this ever-evolving field.
If you've ready the introductory blog, then you know this post is the second in a series of steps of aligning a virtual 3D model with the real world, you know, for fun and profit.
Let's talk about photogrammetry, meshes and all that stuff.
I did about 8 weeks of 3D modelling in a BTEC filmmaking course about 20 years ago… so I had to dust of the proverbial cobwebs in the dark corners of my memory, but overall it's a pretty straightforward process.
There were three parts to this:
- Running the Agisoft metashape workflow
- Simplifying the mesh to make it 'Game Ready'
- Reapplying the texture and Blender tweaks
1. Photos, lots' of photos
Agisoft Metashape is an awesome piece of photogrammetry software. Oddly, I had better results from the standard version than the pro version, using identical photosets. So, grab the software and get a 30-day free trial started.
(note: I don't work for Agisoft, there is probably alternative software but this is what worked for me).
Next up, I took 900 photos of my climbing wall. Lighting was a pain at first. You have to make sure none of your photos are blurry or have light-sources washing them out, also no windows or reflective surfaces or you end with something like out of a Dali painting. In my second iteration, I used only 300 photos and got results just as good.
One really nice thing about Metashape is the workflow menu makes it really easy. You can follow each menu item in sequence ( Add Photos -> Align photos -> build dense cloud -> build mesh -> build texture ) using just default settings and get excellent results.
I made a few changes to the settings to reduce the number of vertices, without flattening the climbing holds on the mesh and got a result I was happy with after about 7 hours of overnight processing on my laptop.
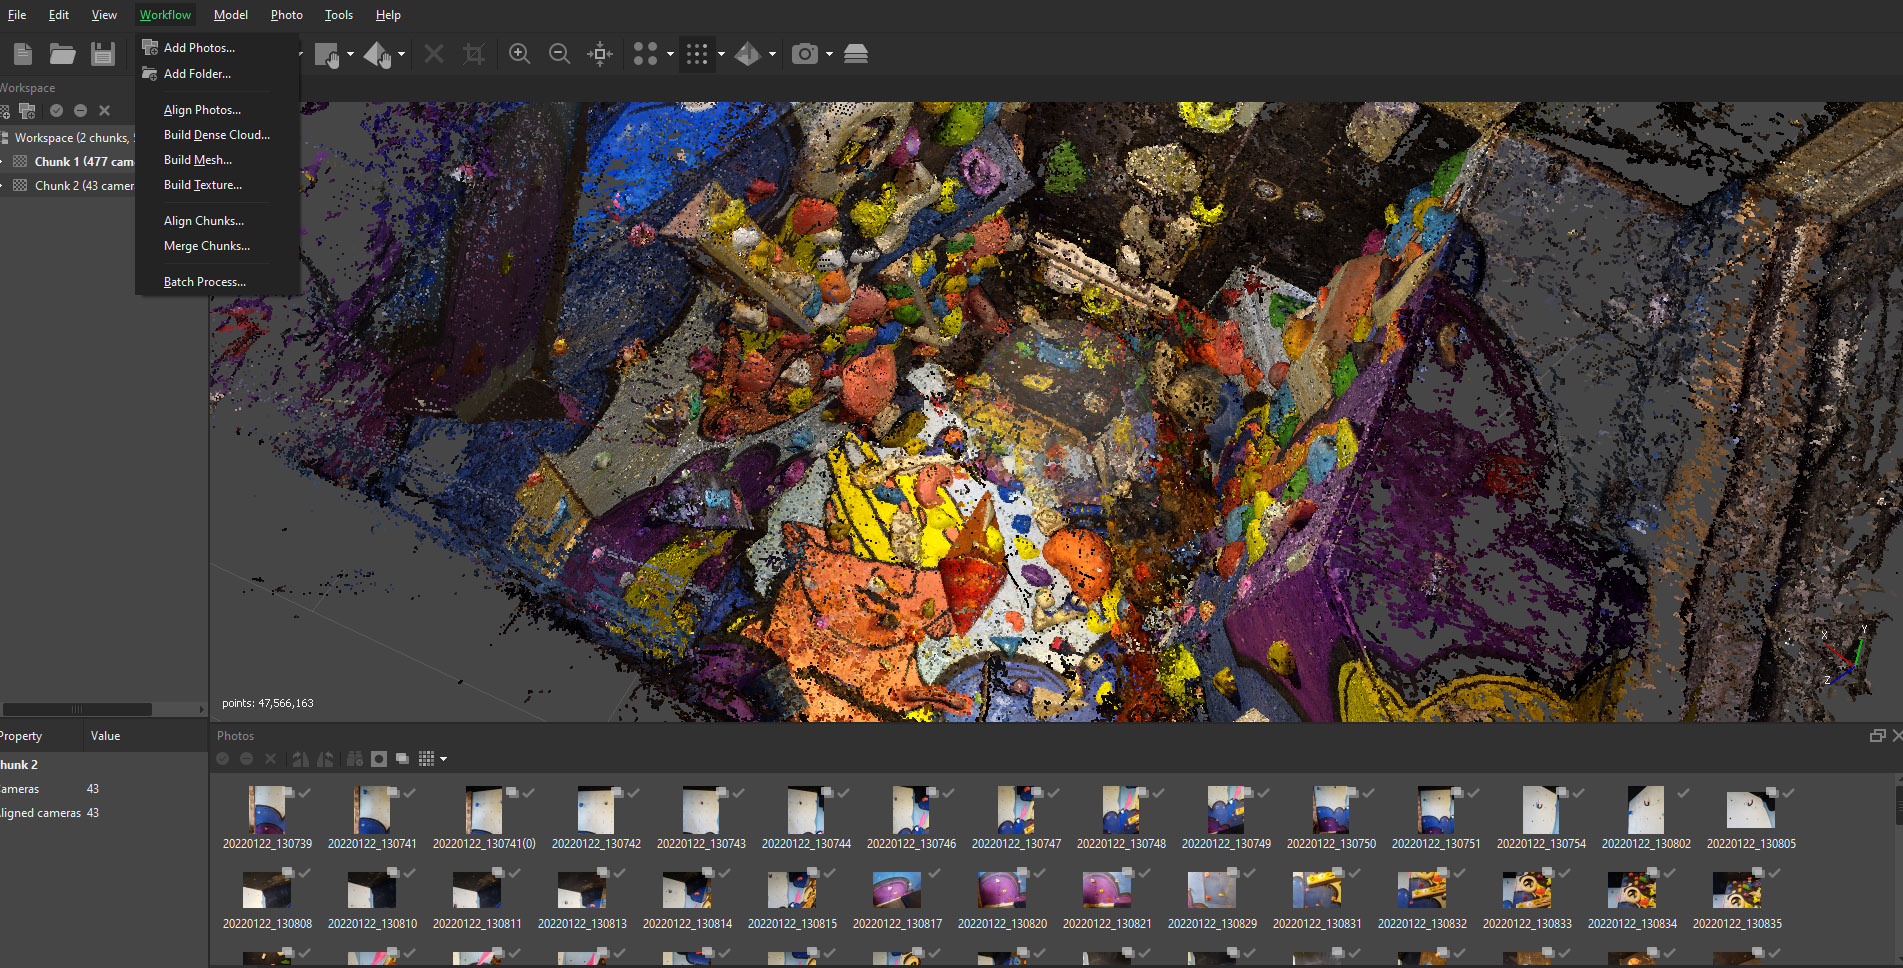
Before exporting, I also use this opportunity to go use the freeform selection tool to delete any parts of the mesh i don't want. Like the floor, parts of the room that aren't part of the climbing wall, floating vertices that result from the mesh generation etc.
The resulting export from Metashape is a textured .OBJ file. At present there is no scale or orientation, but these are easily solved later in Blender.
First though…
2. Simplifying the mesh
The 13 million vertices of the original model did not play nice with Unity. I don't know enough about Unity to know whether that was my bad code, or some normal limitation… I feel like the folks over at Valve would have no problem with this.
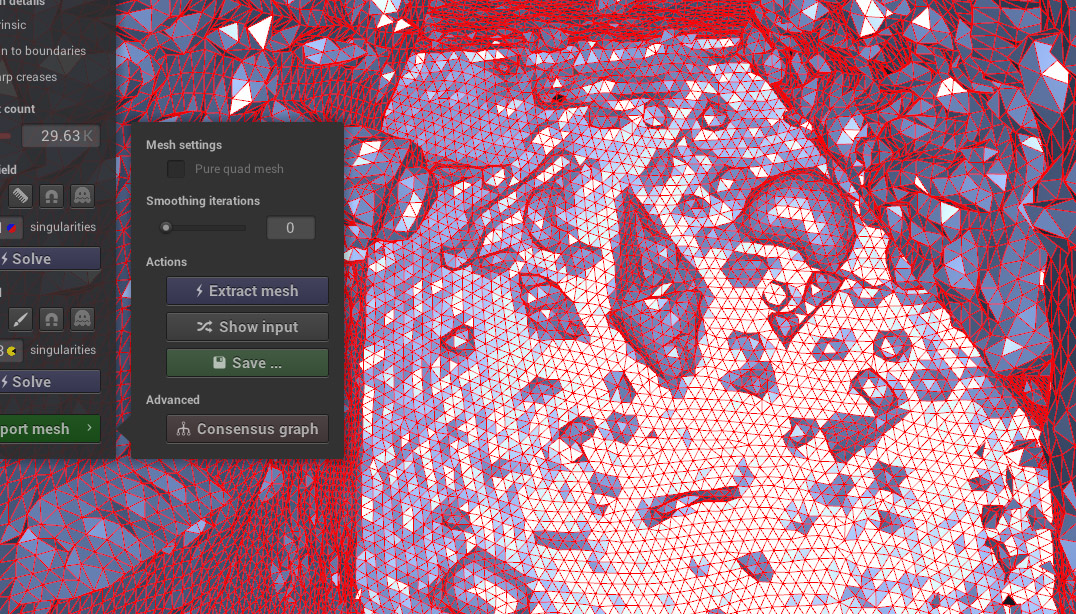
InstantMeshes is a great free tool for retopology. The one drawback is that it will lose your UV maps/textures so the output mesh will need baking in Blender (more in a moment).
Importing the mesh into InstantMesh is super easy. Then it's up to you to play around with the settings. For me, I needed as low number of vertices as possible without flattening the wall. If I reduced it too much, all the holds kind of erode down to nothing. About 30,000 vertices was good enough for me.
The step I never took:
You'll notice with a climbing wall that 90% of it is literally the flat wooden panels which the holds sit on. Technically, in 3D it would be ideal to have these panels as a really simple plane, with just four vertices. In my approach, even these flat sections of wall still had loads of vertices, as shown in this screenshot from InstantMeshes.
I wondered if I could extract the holds from the mesh and then have a separate really simple mesh for the wall panels, and then some other mesh for the holds whicch could be more complex… but this was wayyyy to much work and I couldn't really think of an easy way to do it.
The resulting mesh had ~30000 vertices and runs pretty good on the Quest2, even with various lights and a mesh collider.
3. The texture
Last step is to bake the texture back on to the simplified mesh from instant mesh. For this I found an online tutorial that worked a charm. Simply, you import your original Metashape .obj and your new InstantMesh .obj. If you haven't messed around with the mesh files, they should sit perfectly on top of each other in Blender.
After that you create some blank texture images and generate your UV map for the InstantMesh mesh. Then you have to make sure you select each model in the right order ( I messed this step up lots of times ) and then hit the bake button.
Once the texture is baked on I used Blenders ruler tool to scale and reorient it so that it was the right way up and matched roughly the scale of the real wall.
Exporting for Unity.
For the Quest 2, I export to FBX and import the model as a game asset and then have it as a prefab. It's easy to bring the model and textures into unity with this format.
For the desktop app, I exported to GLTF. The reason is I found a nice GLTF importer for Unity ( which I couldn’t get working on VR ( yet ) ). On the desktop app, this means I can drop 3d models on a server, and my brother can download them on his desktop (he's a climber too and his his own wall… shown below).

Now you have a simplified mesh that looks great.


